Friday, May 29, 2015

Sometimes We Really Hate Clean Up - Salmon in Parchment Paper with Asparagus and Mushrooms and a Garlic Caper Butter Sauce

**Sorry for the delay in posting this recipe!  I wrote half of this blog post on April 30, but then I went to COSTA RICA FOR TWO WEEKS!  I am just getting back into my groove and should have another two recipes (as in we already cooked them, now I have to write!) soon!  Thanks for checking out my blog and enjoying our story and recipes!**


Alright, that's a little misleading - WE ALWAYS HATE CLEAN UP!  Our kitchen is a little small, so we have to make sure we stay on top of cleaning the dishes or else the sink is unusable.  Thus is the life in our adorable fifth floor walk-up.  We love it!

It started out as a typical Wednesday.  Take my little buddy to "school" followed by a quick coffee shop run to Irving Farm to get our fave treat - pretzel sticks!

Little buddy practicing driving.  Might as well
get good at backing up because she will need to know
how to parallel park as a city baby!

We are excited about pretzel sticks!  
After my fun day with the munchkin, Jeffy and I decided we wanted to cook something healthy and easy.   We also picked a recipe that requires basically no clean up, which is pretty amazing.  We wrapped all the ingredients in parchment paper, tossed the individually wrapped meal on a baking sheet, and let it do some magic in the oven.  Alright, so there was a little pre-cooking of the mushrooms, but that was it and we used the pan again to make the sauce!  A single pan clean up and baking sheet wipe-down is pretty darn good for a gourmet meal!

We began preparing our fancy looking meal with my sous chef Jeffy slicing the lemons into rounds while I cooked the mushrooms in a skillet with a little bit of olive oil.

 
Next we trimmed the asparagus.  I always tear it at the vegetable's natural bend so we do not end up eating any of the woody ends.  Yuck!  We layered the asparagus over Jeffy's nicely sliced lemon rounds.


Then I showed off my lovely asparagus mustache and wild hair.  Man, I need a haircut and a keratin treatment!

The next step was layering the cut salmon (thank you, Jeffy!) over top of the asparagus bed and adding salt and pepper.  Finally, you add the precooked mushrooms!


Then we wrapped the salmon into its parchment and flipped it so the lemon was on top and could ooze deliciousness all over the whole packet!


Jeffy chose to wrap his in a little tin foil because the parchment was just a little too small, which totally works, too!


We cooked this creation in the oven for about 15 minutes at 400 degrees.  While it was cooking I made a garlic butter caper sauce in the same pan I had prepared the mushrooms.  I added two cloves of minced garlic into a pan on medium heat along with about four tablespoons of butter.  After letting that marinate together for a moment I added salt, fresh ground pepper, and one to two tablespoons of capers. 


After the fish was done and unwrapped it looked like this....


To which we added the garlic butter caper sauce (you could totally add more lemon, I just forgot to when I made this version!) to get this final product!  (Photo credit:  Jeffy and his new fancy camera!)


So the only dishes we had to do were the ones we ate off of, and the skillet and spoon!  Hooray for easy clean up during the week!

Here is the recipe.  It's super simple and you will be extremely happy not to have to clean up much!

Salmon in Parchment with Asparagus and Mushrooms and a Garlic Caper Butter Sauce

Ingredients:
- Salmon portions (around 4-6 ounces per person, but we each use half of whatever package we buy!)
- Asparagus (around 4 - 8 pieces per person, trimmed)
- Lemon, sliced into rounds
- 12-16 ounces of mushrooms, sliced
- 1 tablespoon olive oil (for mushrooms)
- 4 tablespoons of butter (we prefer salted, but that's because we also use it on our popcorn!)
- 1-2 tablespoons of capers
- 2-3 cloves of garlic, minced
- Salt and pepper
- Parchment paper

Directions:
1.  Preheat oven to 400 degrees.
2.  Cook mushrooms in a skillet with olive oil.  While the mushrooms are cooking, trim asparagus by snapping the ends off at their natural breaking point.  
3.  Prepare parchment paper for each salmon portion on a baking sheet (or two if more than two servings!).  Place the lemon rounds on the bottom and layer the asparagus next.  Add the salmon and salt and pepper it.  Finally, top with the cooked mushrooms.  Seal the parchment with your hands and flip it over so the lemon side is facing upward and place in the oven for 12 to 15 minutes depending on your preferred level of doneness.
4.  While the salmon is cooking, use the same skillet you prepared the mushrooms in to make the sauce by adding the garlic and butter at medium heat.  After the butter has melted a moment, add the capers and salt and pepper.  Let it cook together for another minute and then remove it from the heat.  
5.  Take the salmon out and serve it lemon side down.  Top the whole thing off with a spoonful or two of the caper sauce.
6.  Enjoy!


Friday, April 24, 2015

Sometimes We Go Along With Made Up Holidays - National Grilled Cheese Day!

Someone squirreled away in some office somewhere has had a great time inventing made up "holidays."  The social media world exploded with pictures of people when they were young and incredibly adorable (not that you all are not still adorable, but you were cuter at age seven and you know it!) for "National Sibling Day" on April 10th.  Later that weekend, on Sunday, April 12, a "holiday" I could really get behind happened.  (I love my brother and we just had a great time this past weekend when he brought his whole family along with my parents to the city for a visit, but I did not feel the need to share pictures of me looking adorable and him looking awkward - he is six years older than me, so he hit that stage right in my prime cuteness years.)  Sorry about that aside, I felt it was important to discuss.  Back to the "holiday."  Apparently someone decided to make the next social media "holiday" National Grilled Cheese Day and I was THRILLED!  Who wouldn't love a day in which one melts cheese between two delicious pieces of bread and decides to overshare with the world??

Alright, so I learned about this "holiday" after running my second race in two weeks - this time just a four miler.  I ran a nice #slowbutsteady pace and beat my goal time, so I was proud.  I was also proud I had not run myself into the ground by trying too hard and not being able to do anything else that day even though we had gone on a GORGEOUS hike the day before!  (Yes, I had to skip my soccer game because I was somewhat tired, but I also had to save my legs for the half marathon I was running the next weekend!)

The view from our hike up Bald Mountain (same area as Bear Mountain)
in New York.  #nofilternature
Taking a break and being goofy after completing a very steep climb!
The most adorable husband ever enjoying our hike!
Post-hike we were looking for something delicious to eat in the area and found Foodies in Fort Montgomery, NY and it was AMAZING!  Look at that pizza!  Racing strips of mozzarella, pesto, and their house tomato sauce!  Soooooooo good!

Hiking in the Bear Mountain area?  Go to Foodies.  Get a pizza.
Thank me later!:)
Back to Sunday/the best fake "holiday" ever (aside from National Talk Like a Pirate Day0.  After the race Jeffy (best husband/fan section a girl could ever have!) and I went to our gym and grabbed some smoothies while we wrote a grocery list.

Proud I finished the four miler, still felt good, and ready for smoothies!
#earnedthebagel
We made it to our beloved Trader Joe's (TJs) by 11am and it was the calmest shopping experience there EVER!  Also, they had everything we wanted for all of our recipes, so we did not have to make any substitutions!  Apparently Sunday morning shopping with the slightly older crowd is the best time to go because the shelves were FULL!  Let's keep the Sunday morning uncrowded/fully stocked shelves thing a secret between you and me, alright?  Thanks!

Post-shopping I needed some couching time and we hung out for a while before heading out on a walk to stretch our legs and say goodbye to Jeffy's amazing Spring Break relaxation week (during which he worked incredibly hard at his new hobby - computer programming - and earned a seat at an amazing programming school/"computer camp" for the summer!  So proud!).

Walking in Riverside Park.  You can see the
George Washington Bridge in the background.
Ask Jeffy to tell you a story about that bridge!

Enjoying the blue skies!
Oh, I guess here is where we actually get to the cooking part!  You never thought I would get there, did you?  Well, here we are!

My favorite grilled cheese ever is at a coffee shop in the West Village called Grounded Coffee.  I have dragged several friends here and done countless hours of lesson planning and grading here while enjoying a delicious chai latte and a grilled brie and apple on multigrain bread.  It is AMAZING.  So that is what I decided to do for my made up "holiday" sandwich.  I used a light brie from TJs, Granny Smith apples because that tartness is delicious, a drizzle of honey, and some arugula on a multigrain bread.  For anything we "grill" in our house - whether it is burgers (except for these ones, which we cooked in a pan) or grilled chicken or panini sandwiches to go on the side of delicious soup or simply toast like we did for this recipe - we use the George Foreman grill (lovingly called JorgĂ©).  So we grilled these panini-like grilled cheeses on the Foreman, but you should use any technique - baking, pan cooking, or even a fancy-schmancy panini press - that you prefer!

Here are the photo-instructions for how to create an amazing grilled cheese/panini!

Jeffy is the best sous chef ever and sliced those
Granny Smith apples nice and thin!
Action shot of the brie slicing!  Go Jeffy! 
I drizzled olive oil on the side of the bread touching the grill,
then I layered the slices of brie and apple on the pre-warmed "grill". 
Next I added a drizzle of honey to add a little sweetness to
counteract some of the delicious tartness of the apple.
Finally, I added some arugula.  I liked the arugula, but you
might like it best as a side salad rather than in your sandwich!
Of course I added another layer of bread at this point with some
more olive oil drizzled on top.
The final product!  

Here is the recipe - tweak it to whatever combo you like best.  Maybe add some berry jelly instead of the arugula and use the arugula for a side salad with a honey vinaigrette!

Brie and Apple Grilled Cheese

Ingredients:
- Two slices of our favorite type of bread - I used a multigrain
- A few slices of brie cheese, sliced about 1/8" to 1/4" thick
- A few slices of apple - I prefer Granny Smith for the tartness, but most types work well - also sliced flat and the same thickness as the cheese
- A drizzle of honey
- A drizzle of olive oil for each piece of bread
- Several leaves of arugula (you could also use this as a side salad instead of on the sandwich!)

Directions:
1.  Warm up your grill/grill pan/oven/however you make grilled cheese.  (We use a George Foreman grill.)
2.  While your source of heat (let's call it the grill to make things easier) is warming up, slice the brie and apples.
3.  Drizzle olive oil on one side of a piece of bread and place the oiled side down on the grill.  
4.  Layer the cheese, apples, a drizzle of honey, and the arugula (if you have it/want it) on top of the bread.
5.  Add the second piece of bread on top and drizzle a little more olive oil on that.  Grill for about three minutes or until the cheese is melted and remove it from the heat.  
6.  Slice your sandwich in half and enjoy!


Friday, April 17, 2015

Sometimes I Am Really Late Writing!

So I have been a bit preoccupied with hanging out with my niece during the day and with my upcoming trip to COSTA RICA with one of my most favorite people in the world and with my attempt to get in a little better shape so I survive a half marathon after only a little over three weeks of running....this could get ugly!

Those are my excuses for slacking.  I apologize.  It will happen again, so I apologize again in advance!  Life gets busy, especially when the weather is finally nice!

Alright.  To the actual food and the awesome day before we made the delicious food.

Jeff bought a Groupon voucher for Tea at The Pierre Hotel and we went on a Sunday.  The tea started with some bubbly....delicious!    


Then we got our delicious sandwiches, scones, and cookies!  They were sooooooo good!  


Followed by our tea....both teas were delicious, but Jeffy chose best with The Pierre Blend.  You have to get it if you go!

Jeffy is a particularly adorable tea drinker!  


Then we took a goofy picture of me in the hotel....the Garmin watch goes very well with my dress, don't you think?


Finally we headed home.  We walked through Central Park back to the west side (aka the best side!) because we were so full from the goodies that we needed to stretch a bit!  We found a very steep slide and Jeffy was brave enough to go down it!

Jeffy being brave!

Then....after we walked about two miles and went shopping, we finally made it home.  We were definitely not in the mood for something heavy, so we made EGGPLANT PIZZAS!  We used the sauce I had already made the day before (Delicious Sauce Recipe!) instead of a jarred sauce.

To make eggplant pizza, you begin by preheating the oven to 425.  Then you cut the eggplant, beginning by removing the ends.  I slice mine in half so I can easily "peel" the skin off without losing too much of that delicious eggplant.  I use a knife to remove/"peel" the skin away because, although the purple skin is beautiful, it is a bit tough to eat.  

I halve the eggplant, then use a knife to slice the skin
away without losing much of the actual eggplant.
After removing the skin, you cut the eggplant into disks between 3/4 of an inch to a full inch thick.  Place them on a parchment lined baking sheet, drizzle with olive oil, and sprinkle with salt.  Bake the disks for 12 to 20 minutes depending on their width.  Ours were small and our oven was fully heated, so they only needed 12 minutes.  

Pre-cooking to remove some moisture.

Post-cooking

Take the eggplant out of the oven and turn on the broiler.  Top each disk with a spoonful of sauce and sprinkle with either shredded mozzarella or Parmesan cheese and place under broiler for three to five minutes.  I recommend finishing each "pizza" disk with a basil leaf, but we just planted ours, so we don't have any yet!

Pre-broiling with sauce and cheese! 
Post-broiling deliciousness!

I topped mine with red pepper flakes and some oregano.
I recommend basil, but our "garden" has just started!

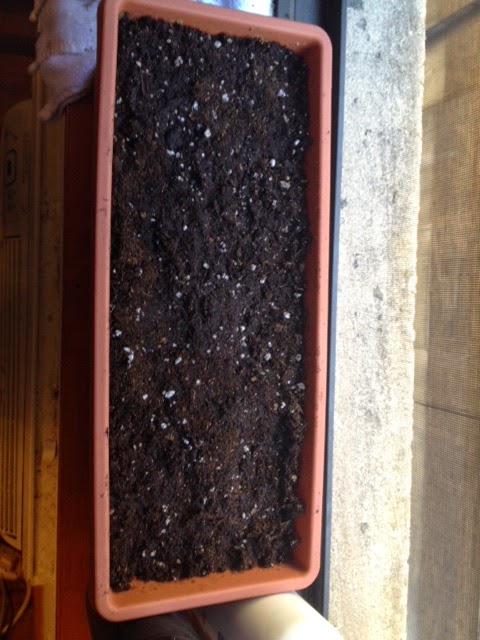
Here is our basil garden - we also have cilantro and I cannot wait to make some Chicken Taco Pizza!

Basil "garden" day one....

Also, this entry was proofread by Lisa, so if there are any typos/issues, please send all comments her way!

Lisa working on the blog!

Here is the recipe:

Eggplant Pizza

Ingredients
- Jarred sauce or THIS DELICIOUS SAUCE
- One or two medium or large eggplants 
- Shredded cheese - mozzarella or Parmesan works well, but whatever you like!
- Olive Oil
- Salt

Directions
1.  Preheat oven to 425.
2.  Cut the ends of the eggplant off, then slice it in half (or thirds if very large).  Remove the skin with a knife (picture above!).
3.  Take "peeled" eggplant and cut into disks of about 3/4 of an inch to 1".   Place the disks on a parchment-lined baking sheet and drizzle with olive oil.  Sprinkle a little salt over each disk as well.
4.  Bake the eggplant for 12 to 20 minutes depending on size.  The purpose of this baking is to cook it through and remove some moisture.  
5.  Remove them from the oven and turn on the broiler.  
6.  Top with a spoonful of sauce on each disk and sprinkle with your choice of cheese.  
7.  Broil for three to five minutes.  
8.  Season with basil, red pepper flakes, and/or oregano.
9.  Enjoy!


Saturday, April 11, 2015

Sometimes Jeffy Does All the Cooking - Guest Post by Jeffy the Great

Emily and I are a pretty good team in life and in the kitchen. She does a lot of the cooking, but I also cook up many delicious meals!

One of my best is Sausage Soup. We call it "Snausage Soup", because that's funner to say. It's probably more accurately called "Chicken Sausage, Pasta, Vegetable Soup", because it has all those things.

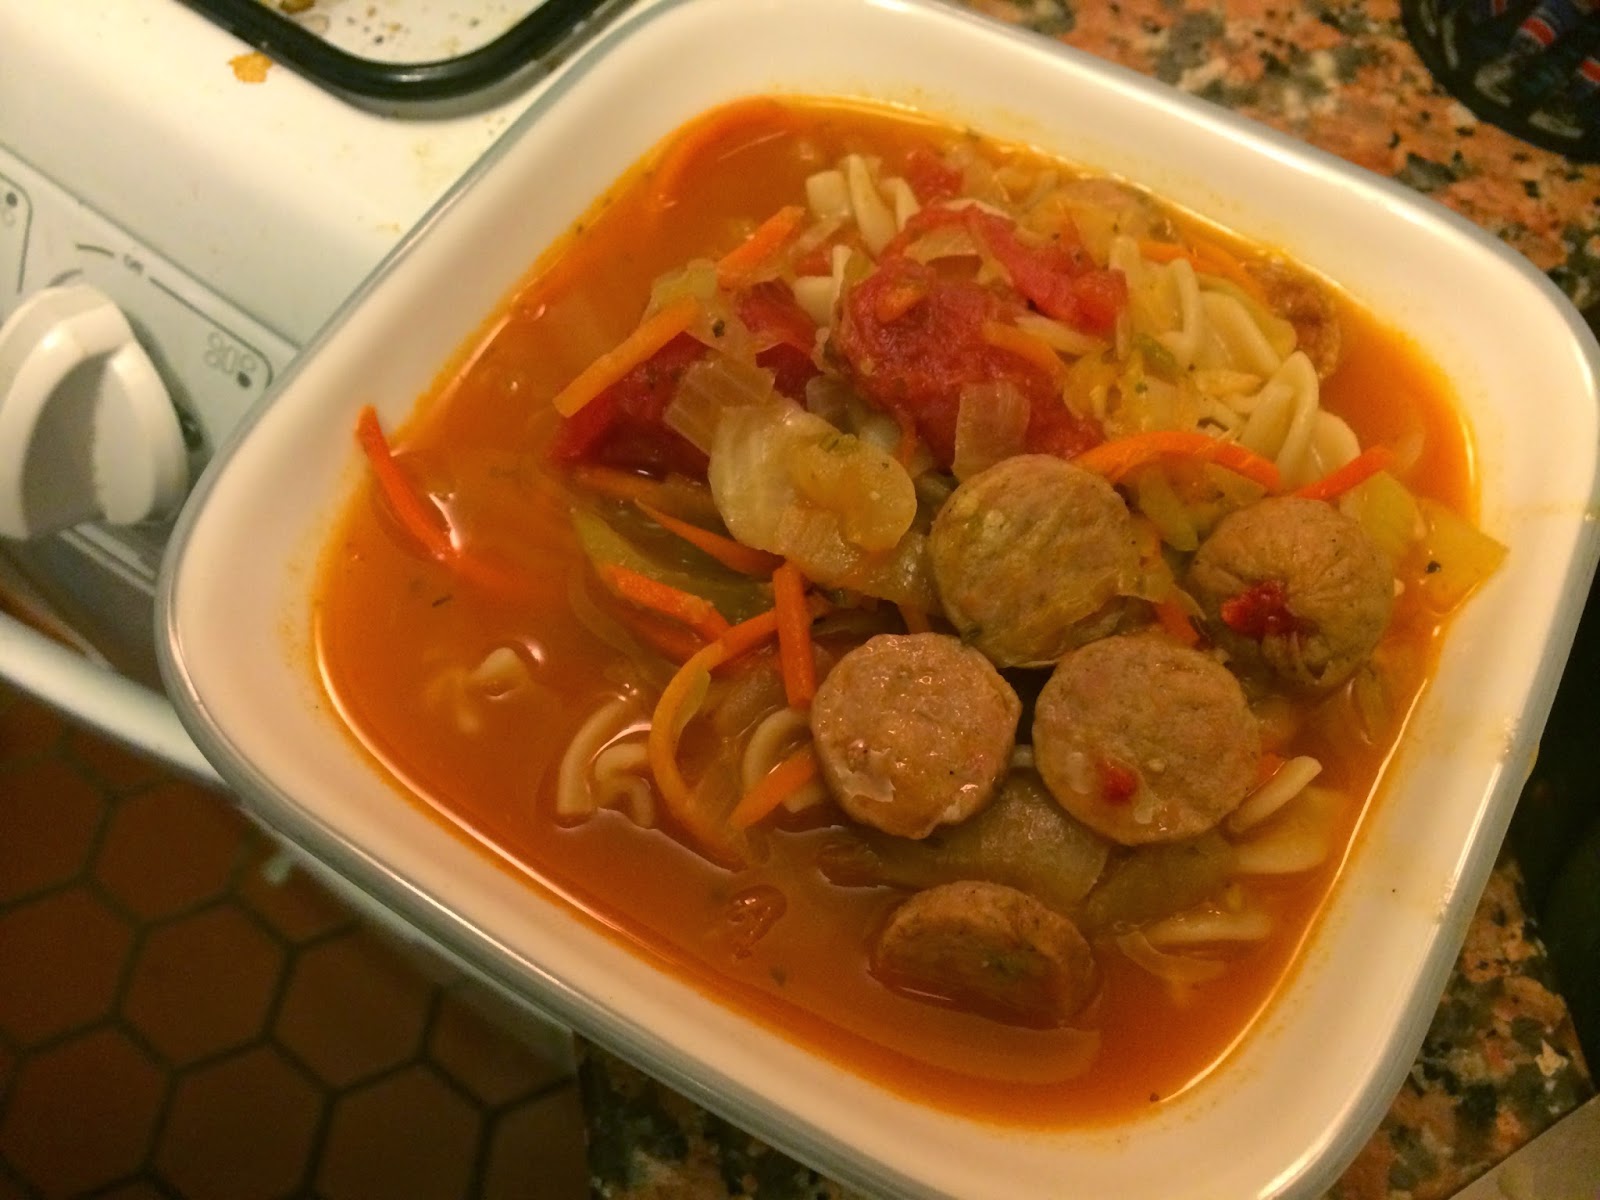
Here's a pic of the finished product
It's got tomatoes, cabbage, carrots, onions, chicken sausage, and brown rice pasta.

I made this soup on March 31, 2015. I remember the date, because it was my birthday. Why was I making dinner on my birthday? Cuz I'm awesome, that's why.

Don't get me wrong, Emily got me lots of great stuff for my birthday, including a nice dinner out. It's just that we were pretty tired on this night, and just wanted a tasty, quick dinner. Earlier in the day, she brought Lisa and some Magnolia Cupcakes to my work, and surprised me along with our friend, Joy.


Emily was doing some Yoga in our Yoga studio.


So I got out all the ingredients for the soup.


I started with 3 packs of Trader Joe's Sweet Italian Style Chicken Sausage. We use these because we like TJ's, it's cheaper than most other chicken sausage options, and because it does not have any pork casing.*

You start by cutting the sausage into about 1/4" full moons, and then sautéing those until they get a little brown.
While those full moon sausages are browning, dice up four whole onions. If you're tempted to cry from all that onion chopping, just look over at your cute wife who's doing yoga and posed in some pretty attractive positions. That'll cheer ya up!

With all the sausages and onions in the pot, it'll look like this...


Here's where shopping at TJ's comes in handy. The next step is to add diced celery, shredded carrots, shredded cabbage, and some canned whole tomatoes.**


You dice up the celery, add the whole bag of cabbage, the whole bag of carrots, and mix it all together. Then, you add the two cans of unsalted, whole plum tomatoes and mix it some more.
At this point, you add in all the spices you think will be good in the soup. I recommend a lot of salt and pepper. I'll also add oregano, poultry seasoning, dried rosemary, garlic powder, and a pinch of red pepper flakes at this point.***

Now, add in about 10 cups low-sodium chicken broth. You can use beef or vegetable broth here, too. I use about 8 cups of broth and 2 cups of water because the TJ's broth comes in 4 cup containers and I only want to use two containers.

It'll look about like this, hopefully. Make sure you save about 2 inches at the top of your pot, because you've still got to add the pasta. 

Bring that whole pot to a boil. It'll take a while. I recommend checking Facebook on your phone at this point, or watching Emily do yoga some more.

Watch wife do yoga while waiting for soup to boil
When it finally boils, add four cups dry BROWN RICE pasta. Once you got those pastas in there, it'll be full up to the top of your pot, like this:


Turn heat down to low and let it simmer for at least as long as the pasta takes to cook, about 12 minutes. 

It's very important to use brown rice pasta for this soup, as opposed to regular semolina flour, white pasta. The brown rice pasta starts to break down slightly when you cook it in broth in such a way that it thickens the broth. It helps give this soup a stew-like consistency, as opposed to a watery consistency. It gets even thicker when you reheat it then next day, too. 

You're done! Put that soup in a bowl and eat it.  
Here's the soup

Emily likes hers topped with some shredded mozzarella cheeses

The soup gets even better leftover. Our adorable niece, Lisa, even enjoyed some of the leftovers!

Toddler Appoved!
Here's the recipe...

Chicken Sausage, vegetable, brown rice pasta soup
(Serves a medium sized army/about 16 bowls or so)
Ingredients
- 36 ounces precooked sweet Italian chicken sausage
- 4 onions
- 1 head of celery
- 10 oz. shredded cabbage
- 10 oz. shredded carrots
- Two 29 oz. cans of whole plum tomatoes, preferable unsalted
- 10 cups chicken broth
- 4 cups dried BROWN RICE fusili pasta
- about 1 cup shredded mozzarella cheeses
- 1 T olive oil
- 3 T salt
- 1 T black pepper
- 1 T dried oregano
- 2 t poultry seasoning
- 1 t dried rosemary
- 2 t garlic powder
- pinch of dried red pepper flakes

Directions
1.  Heat a large soup pot, at least 8 quarts, over medium heat.
2. Chop the sausage into 1/4" fullmoons. Saute in 1T olive oil until lightly browned, about 5 minutes
3. While sausages cook, dice 4 onions. Add them to the browned sausage and cook for another 5 minutes until onions become translucent.
4. Dice the celery. Add the diced celery, shredded cabbage, and shredded carrots. Cook another 5 minutes.
5. Add both cans of plum tomatoes.
6. Add all the spices.
6. Add the chicken broth. Taste. Add more salt or pepper to taste.
7. Turn heat to high and bring the whole pot to a boil.
8. Add the brown rice pasta. Turn heat to a low simmer. Cook pasta in soup according to package directions, or about 12 minutes.
9. Ladle that soup into a bowl, top with some shredded mozzarella if you want.
10. Enjoy!


Footnotes: 

*It's surprisingly hard to find chicken sausage without pork casing, and I can't understand why. Presumably, a decent percentage of people choosing Chicken (as opposed to pork) sausage are doing so to avoid pork. So, why do most Chicken Sausage offerings come in pork casing? Why not just make that thing all chicken? It's like a restaurant selling a vegetarian pasta option and sprinkling bacon on top. Sure it'd be delicious, but it would not be what a vegetarian was looking for.

**Listen, I know it's cheaper to buy some cabbage and shred it up yourself, but it's only like 50 cents cheaper at TJ's. I've been up since 5:15am, worked from 7am - 5pm, it's my birthday, and I also biked 30 miles, I'm hungry, and I'd like to leer at my wife while she does yoga. I'll pay Trader Joe 50 cents to shred my cabbage at this point.

***Don't stress if you're missing some of these. I use them because they're what is on our spice rack, not for any special, cheffy reason. Make sure you use salt and pepper, but past that, feel free to add whatever spices make sense and aren't too expensive.