Saturday, April 11, 2015

Sometimes Jeffy Does All the Cooking - Guest Post by Jeffy the Great

Emily and I are a pretty good team in life and in the kitchen. She does a lot of the cooking, but I also cook up many delicious meals!

One of my best is Sausage Soup. We call it "Snausage Soup", because that's funner to say. It's probably more accurately called "Chicken Sausage, Pasta, Vegetable Soup", because it has all those things.

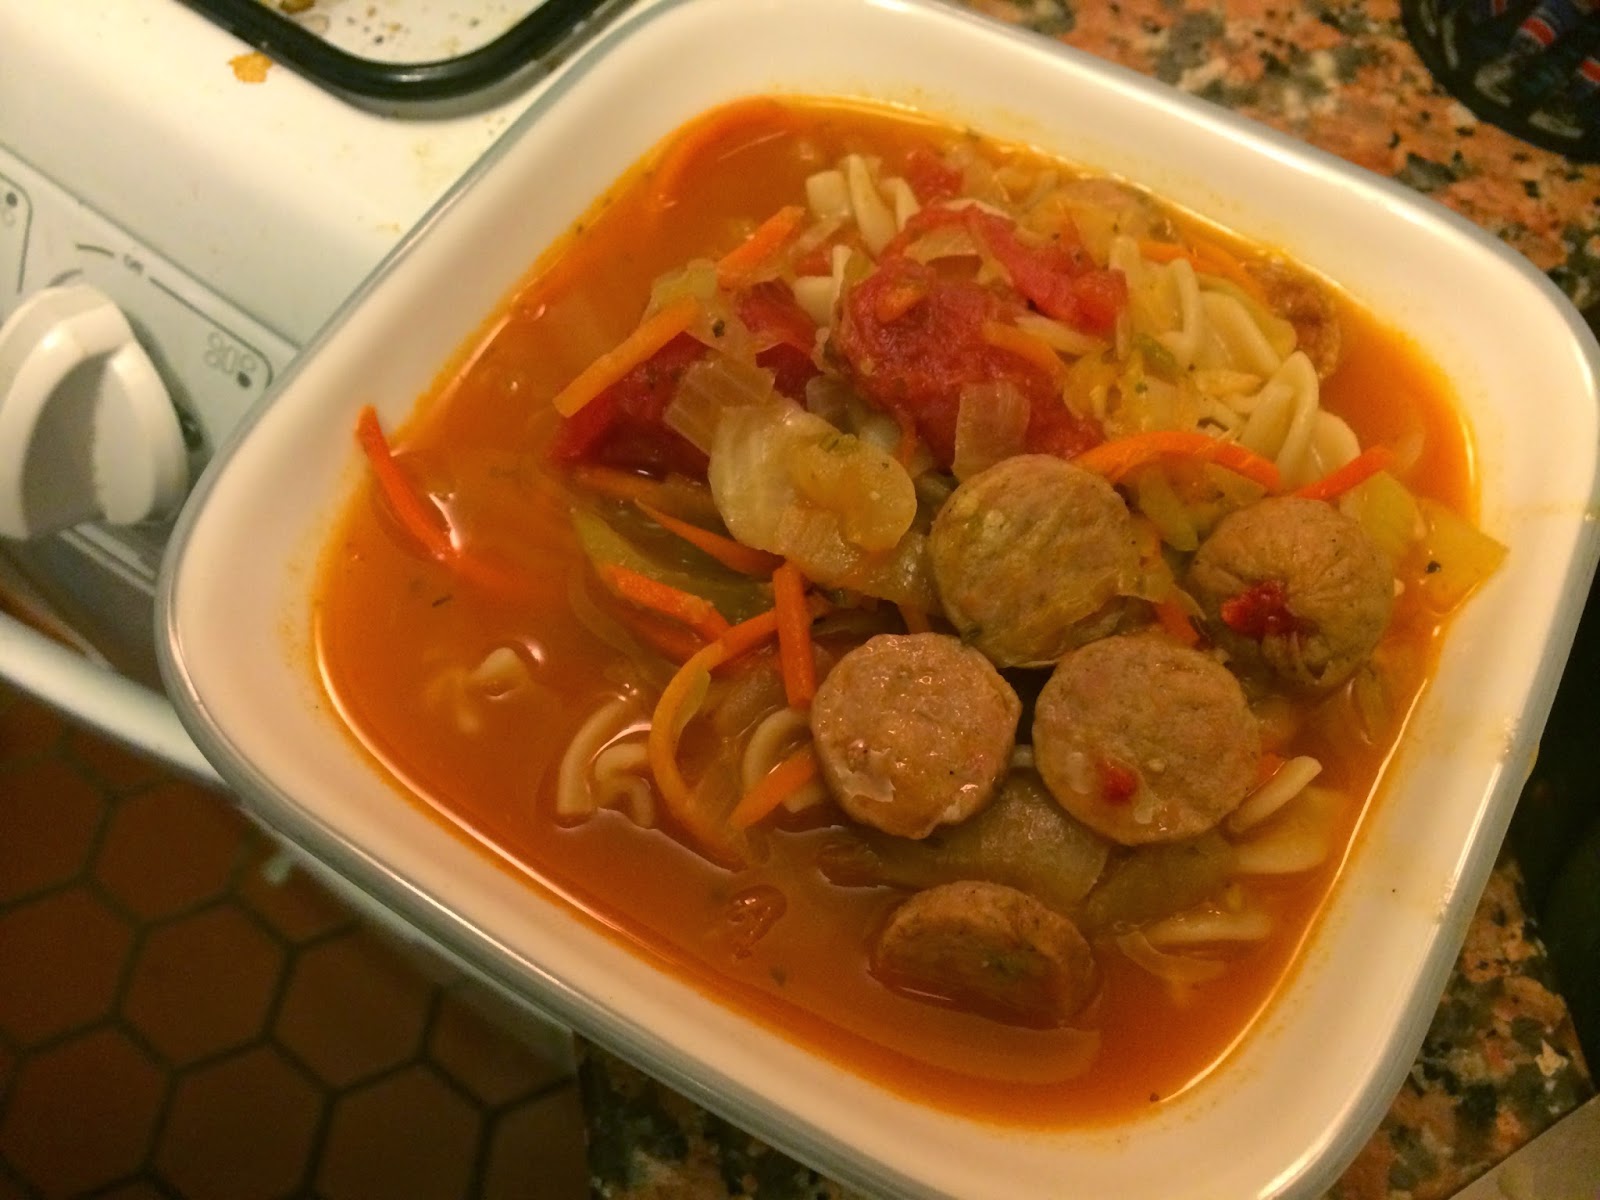
Here's a pic of the finished product
It's got tomatoes, cabbage, carrots, onions, chicken sausage, and brown rice pasta.

I made this soup on March 31, 2015. I remember the date, because it was my birthday. Why was I making dinner on my birthday? Cuz I'm awesome, that's why.

Don't get me wrong, Emily got me lots of great stuff for my birthday, including a nice dinner out. It's just that we were pretty tired on this night, and just wanted a tasty, quick dinner. Earlier in the day, she brought Lisa and some Magnolia Cupcakes to my work, and surprised me along with our friend, Joy.


Emily was doing some Yoga in our Yoga studio.


So I got out all the ingredients for the soup.


I started with 3 packs of Trader Joe's Sweet Italian Style Chicken Sausage. We use these because we like TJ's, it's cheaper than most other chicken sausage options, and because it does not have any pork casing.*

You start by cutting the sausage into about 1/4" full moons, and then sautéing those until they get a little brown.
While those full moon sausages are browning, dice up four whole onions. If you're tempted to cry from all that onion chopping, just look over at your cute wife who's doing yoga and posed in some pretty attractive positions. That'll cheer ya up!

With all the sausages and onions in the pot, it'll look like this...


Here's where shopping at TJ's comes in handy. The next step is to add diced celery, shredded carrots, shredded cabbage, and some canned whole tomatoes.**


You dice up the celery, add the whole bag of cabbage, the whole bag of carrots, and mix it all together. Then, you add the two cans of unsalted, whole plum tomatoes and mix it some more.
At this point, you add in all the spices you think will be good in the soup. I recommend a lot of salt and pepper. I'll also add oregano, poultry seasoning, dried rosemary, garlic powder, and a pinch of red pepper flakes at this point.***

Now, add in about 10 cups low-sodium chicken broth. You can use beef or vegetable broth here, too. I use about 8 cups of broth and 2 cups of water because the TJ's broth comes in 4 cup containers and I only want to use two containers.

It'll look about like this, hopefully. Make sure you save about 2 inches at the top of your pot, because you've still got to add the pasta. 

Bring that whole pot to a boil. It'll take a while. I recommend checking Facebook on your phone at this point, or watching Emily do yoga some more.

Watch wife do yoga while waiting for soup to boil
When it finally boils, add four cups dry BROWN RICE pasta. Once you got those pastas in there, it'll be full up to the top of your pot, like this:


Turn heat down to low and let it simmer for at least as long as the pasta takes to cook, about 12 minutes. 

It's very important to use brown rice pasta for this soup, as opposed to regular semolina flour, white pasta. The brown rice pasta starts to break down slightly when you cook it in broth in such a way that it thickens the broth. It helps give this soup a stew-like consistency, as opposed to a watery consistency. It gets even thicker when you reheat it then next day, too. 

You're done! Put that soup in a bowl and eat it.  
Here's the soup

Emily likes hers topped with some shredded mozzarella cheeses

The soup gets even better leftover. Our adorable niece, Lisa, even enjoyed some of the leftovers!

Toddler Appoved!
Here's the recipe...

Chicken Sausage, vegetable, brown rice pasta soup
(Serves a medium sized army/about 16 bowls or so)
Ingredients
- 36 ounces precooked sweet Italian chicken sausage
- 4 onions
- 1 head of celery
- 10 oz. shredded cabbage
- 10 oz. shredded carrots
- Two 29 oz. cans of whole plum tomatoes, preferable unsalted
- 10 cups chicken broth
- 4 cups dried BROWN RICE fusili pasta
- about 1 cup shredded mozzarella cheeses
- 1 T olive oil
- 3 T salt
- 1 T black pepper
- 1 T dried oregano
- 2 t poultry seasoning
- 1 t dried rosemary
- 2 t garlic powder
- pinch of dried red pepper flakes

Directions
1.  Heat a large soup pot, at least 8 quarts, over medium heat.
2. Chop the sausage into 1/4" fullmoons. Saute in 1T olive oil until lightly browned, about 5 minutes
3. While sausages cook, dice 4 onions. Add them to the browned sausage and cook for another 5 minutes until onions become translucent.
4. Dice the celery. Add the diced celery, shredded cabbage, and shredded carrots. Cook another 5 minutes.
5. Add both cans of plum tomatoes.
6. Add all the spices.
6. Add the chicken broth. Taste. Add more salt or pepper to taste.
7. Turn heat to high and bring the whole pot to a boil.
8. Add the brown rice pasta. Turn heat to a low simmer. Cook pasta in soup according to package directions, or about 12 minutes.
9. Ladle that soup into a bowl, top with some shredded mozzarella if you want.
10. Enjoy!


Footnotes: 

*It's surprisingly hard to find chicken sausage without pork casing, and I can't understand why. Presumably, a decent percentage of people choosing Chicken (as opposed to pork) sausage are doing so to avoid pork. So, why do most Chicken Sausage offerings come in pork casing? Why not just make that thing all chicken? It's like a restaurant selling a vegetarian pasta option and sprinkling bacon on top. Sure it'd be delicious, but it would not be what a vegetarian was looking for.

**Listen, I know it's cheaper to buy some cabbage and shred it up yourself, but it's only like 50 cents cheaper at TJ's. I've been up since 5:15am, worked from 7am - 5pm, it's my birthday, and I also biked 30 miles, I'm hungry, and I'd like to leer at my wife while she does yoga. I'll pay Trader Joe 50 cents to shred my cabbage at this point.

***Don't stress if you're missing some of these. I use them because they're what is on our spice rack, not for any special, cheffy reason. Make sure you use salt and pepper, but past that, feel free to add whatever spices make sense and aren't too expensive.

Wednesday, April 1, 2015

Sometimes We Make Sauce That Will Last FOR DAYS!

You probably can not tell that I have Italian heritage what with my blonde hair and hazel eyes and pretty pale skin....but I am!  My mom is Italian and with that comes some FANTASTIC food!  My mom's Italian butter cookies are a highly anticipated Christmas treat (perfect for dunking in hot drinks!) as well as Grandma's giambotta (an Italian vegetable soup).  Mommy also makes a massive pot of delicious sauce every once in a while and we have it on Sunday over pasta for lunch after church!  Definitely something to look forward to!

This helped inspire me to make our own sauce.  Mommy's sauce has beef chunks, pork sausage, and she makes a mean beef meatball.  The thing is, I have not eaten beef or pork for eleven years.  I do not really miss it at all because I love turkey, chicken, and fish, so we substitute those ingredients into many recipes in our house.  For our sauce we used ground turkey and it is sooooooo delicious we end up eating some of it by the spoonful....Jeffy has claimed he could just eat a bowlful or two for dinner and be happy!

When we make our sauce we have multiple plans for its uses - from regular pizza, to eggplant pizza, to zucchini lasagna, to its intended purpose of being a sauce for pasta.  (I will be posting two of these recipes soon as well!)  So when you have all these plans, a simple single pound of ground turkey and single cans of tomatoes is just not enough.  Instead, we QUADRUPLE the recipe!  All the pictures below are what we did for four pounds of ground turkey (you could sub ground chicken if you prefer), so take that into account when you see the size of the pot!

Since we quadrupled the recipe, we chopped four onions and four (seeded!) green peppers and tossed them in with a bit of olive oil to soften in the pot over medium heat.  As those began to cook, I peeled and minced an entire head of garlic.  That was 14 cloves of garlic....yeah, it took the entire time Jeffy chopped the onions and green peppers and began cooking them!  Finally, I was able to toss the minced garlic into the pot and begin to let those flavors combine with a little salt.  When the onions are translucent, the peppers are softer, and you can smell the garlic, put in the ground turkey and sprinkle some salt over the mixture.  We used the leanest turkey possible because we wanted to lighten up our pasta sauce.  Cook that turkey until it is no longer pink, breaking it into smaller chunks.  Below are a few pictures of the process so far - remember this is for FOUR POUNDS and made a full EIGHT QUARTS of delicious meaty pasta sauce!

The onions and peppers had a minute or two alone, then we tossed the garlic right on top. 

The trio cooked down quite a bit.  (Still have not gotten better at taking pictures of my food....)
The ground turkey combined and cooked until it is no longer pink.
At this point you add the tomatoes!  You use both tomato sauce and either crushed or whole peeled tomatoes from a can.  I have used both and loved each of them (we just smushed the whole tomatoes against the side of the pot).

The army of tomatoes we used to make eight quarts of sauce....
After the addition of the tomatoes, your sauce will look something along the lines of this:

Super full pot of deliciousness before seasoning....
Now comes the most important part - adding the seasoning.  I use dried seasoning because that is what we have right now.  Basil would be great, too, but I just planted ours, so we don't have any yet.  I seasoned the entire thing a total of ten times, each of them looking like the picture below.

Dried oregano, dried thyme, a little bit of crushed red pepper flakes, salt, and ground black pepper.
Next you bring it to a boil, which is really hard and extremely scary when you start with the sauce to the brim like ours was!  Once it has reached a boil you can continue adding seasoning to taste (I have approximated our usage for someone making a single pound of turkey meat for their sauce in the recipe below).  Reduce the heat to low or medium-low so the sauce can get thicker.

The sauce simmers over low/medium-low for about 25 minutes per pound of meat to thicken.
I normally would have let ours thicken a little longer, but we were extremely hungry by this point, so we made some rigatoni from a box (one of my favorite pasta shapes my mom makes with her sauce because it holds the sauce so well!) and were finally able to enjoy it!  Alright, so each of us had already had several tasting spoonfuls to "check the seasoning"/we just wanted to eat it!


I topped mine with some (part skim!) shredded mozzarella.
In a few weeks we will be able to add homegrown basil!

Again, we made A LOT of sauce and will be sharing a few more uses for this sauce soon!

The rest of the sauce ready for the fridge and freezer until we make
pizza, eggplant pizza, zucchini lasagna, and more pasta!

Here is the recipe for this amazing sauce:

Baxim Family Pasta Meat Sauce
(Recipe for one pound of meat, we recommend multiplying and saving for other recipes!)

Ingredients:
- 1 pound of lean ground turkey (we used 99% fat free)
- 14 oz can of tomato sauce
- 14 oz can of crushed tomatoes (or whole peeled) 
- 1 onion, diced
- 1 green pepper, diced
- 3-4 cloves of garlic, minced
- olive oil 
- 1-2 tbsp dried oregano
- 1-2 tbsp dried thyme
- crushed red pepper flakes (decide how spicy you want it to be)
- ground pepper
- salt 
- (basil, if available) 

Directions:
1.  Chop the onion and green pepper, and cook with olive oil over medium heat for one to two minutes.  Add minced garlic and salt.  
2.  When the onion is translucent, the green pepper soft, and the garlic fragrant, add the turkey and some more salt.  Combine and cook through until it is no longer pink.  
3.  Add the tomato sauce and tomatoes and stir well to combine.  
4.  Add oregano, thyme, red pepper flakes, ground pepper, salt, and basil (if you have it).  Combine and bring to a boil.
5.  You may want to add a second round of the same seasonings after tasting using a clean spoon.  If so, do it now.  (I season multiple times throughout the process.)
6.  After the sauce reaches a boil, reduce the heat to low/medium-low and allow to simmer.  The sauce should begin to thicken. 
7.  After simmering for about 15-25 minutes (per pound of meat - if you multiplied it like us it will take about 70 minutes for four pounds and it is totally worth being able to use it for multiple recipes!), do a final seasoning taste test using another clean spoon.  
8.  If you are satisfied, prepare pasta to package directions and top with sauce.  (Or check back later to see how else we use this sauce!)
9.  Enjoy! 

Thursday, March 26, 2015

Sometimes We Only Use Two Ingredients for Dessert

In our house we like dessert.  I am so glad I married someone who also has a bit of a sweet tooth!  We enjoy all sorts of desserts.  We love fruity ones like the these no sugar added mango fruit roll-ups, fruit crumbles like this one, and, of course, we love chocolate.  I have to hide open bags of chocolate chips or else they will "disappear" before we use them in a recipe!  

Sunday evening we realized we did not have any dessert options other than chocolate covered popcorn (it is delicious!) until....Jeffy remembered we had brownie mix and pumpkin purée!  Luckily, pumpkin is a fruit, so we are technically still eating a fruity dessert with chocolate!!!!  It's the best of both worlds!  (Cue Hannah Montana/Miley Cyrus....)  It does mean that my butternut squash soup is technically a fruit soup....but we are not going to dwell on that!

We started making this after being inspired by a Pinterest pin using only those two ingredients to make delicious brownies.  The original recipe also has a frosting, but that makes the somewhat healthy (hey, pumpkin has lots of nutritional benefits!) brownies seem completely indulgent.

To make these tasty brownies you preheat your oven to 350, prepare a baking dish (we are stuck with 8x8 glass containers because an old roommate used to cook pork shoulder in MY brownie tray....the nerve!) with cooking spray (we use a coconut oil one!), and stir the two ingredients together.

Yes, you literally add a can of pumpkin purée to a box of brownie mix and stir.
After mixing, your creation will look nice and glossy, like this:


One of the nicest things about this recipe is that you do not feel slightly guilty at all for eating the batter because there are no eggs!

Jeffy likes the delicious batter!
You bake in your baking dish for 35 minutes at 350.  Test the brownies by sticking in and removing a toothpick.  If a lot of cake comes off, then you should allow them to cook a little longer.  We used a Family Size box at 350 degrees and it took about 45 minutes to cook through and create the delicious brownie you see below.  It is not perfectly smooth and crumbly on top like a traditional brownie because it is essentially a different product.  It's a slightly healthier one! 

The finished product!
We cleaned out that 8x8 dish of brownies in only three days....they're that good!

Here is the "recipe" for this simple concoction! 


Two Ingredient Pumpkin Brownies

Ingredients:
- Can of pumpkin purée (recipes always remind you to use purée and not pie filling, so here is my reminder to you!)
- Box of brownie mix (we used a Family Size box for thick brownies and so we can eat more batter)
- Cooking spray (we use coconut oil spray) or butter 

Directions:
1.  Preheat oven to 350 degrees.
2.  In a large bowl, mix together the brownie mix and entire can of pumpkin purée so it is all incorporated and seems glossy.  (TASTE IT BECAUSE IT IS SAFE!  NO EGGS IN THIS MIX!)
3.  Prepare your baking dish with cooking spray or butter.  
4.  Bake for 35 minutes and test with a toothpick.  If it is clean-ish, remove and let cool for a minute.  If it is not clean, bake for a few minutes longer.  Ours took 45 minutes in an 8x8 baking dish because we make them thicker using a Family Size box.
5.  Remember, these are not traditional brownies.  They will appear glossy on top throughout the few days they last in your house.  It is ok!  Keep eating them!
6.  Enjoy!


Wednesday, March 25, 2015

Sometimes I Make 100% Natural Desserts (Without Sugar!)!

One of my favorite things in a dessert is fruit.  Don't get me wrong - I am an adult and female, so I do love dark chocolate, but there is something fun about making a sweet treat using fruit.  I made this easy apple galette a few times last fall:


I had three people in mind making the 100% fruit, nothing added mango fruit roll-ups - me (part of the joy of cooking to me is making something relatively healthy that I will enjoy), Jeffy (it is also fun to cook for adorable husbands who can take treats easily with them while biking!), and, of course, my Lisa-buddy who loves her fruit and veggies and anything that seems like a special treat!

I made it the evening I also cooked this butternut squash soup.  Apparently orange food was all the rage that day, even though it took so long to make the treat that Jeffy did not get to try it until the next day!

This recipe is literally nothing but the actual fruit "fruit roll-up".  I used mangoes because I love them and I was able to find three fantastic ones at Trader Joe's.  Once you have acquired the delicious looking mangoes, you have to somehow get out the actual fruit.  Yes, the traditional method of cutting the fruit close to the pit into halves and then scoring it with a knife not quite through the skin and finally popping out the fruit into lovely cubes is fantastic when one wants to snack on some mango (I just enjoyed some before writing this post, but sadly little Lisa was suspicious of this fruit she had enjoyed just one week ago in a different form!).  However, if you want to use as much of the fruit as possible and you do not need lovely cubes because you a puréeing it in the blender/food processor anyway, I suggest using a peeler and then cutting it into bigger chunks like below.

Peeling the skin from the mango ensures you get more fruit and saves you several knife strokes!  (Pardon the terrible manicure, I am going this weekend, I promise!)

My lovely larger and non-uniform mango chunks prior to blending. 
Once you have peeled, sliced, and tossed your mangoes into the blender....BLEND IT!

The three mangoes I used yielded about four cups of sweet, delicious, NATURAL purée.
After blending, you want to spread the purée on one or two parchment paper (or SilPat) covered cookie sheets with a rim on them so the purée stays contained.  The purée should only be about 1/8 to 1/4" thick.  I spread it evenly using a spoon, but if you have an offset spatula, that would work best.    Then you pop them into the oven at the very low temperature of 175 degrees.  My oven knob does not even have any numbers below 200, so I started by pre-heating it at 200, then reducing it slightly.  What you are actually doing to the fruit is dehydrating it, not cooking it.  Of course, if you have a fancy dehydrator, then this could be done in that I bet....but this is for regular folks with tiny kitchens!  You cook it long and low for about four hours (mine was slightly thicker, so I recommend checking at three hours to see if it is done), checking it every so often to make sure it is dehydrating and not cooking through, until it becomes glossy and sticky to the touch like one of those less-than-natural concoctions they sell in stores.

It will look something like this:

Dehydration complete!
After it is done dehydrating, you use a spatula to lift the fruit leather from the parchment paper and place it onto a fresh piece of parchment paper.  Using a pair of clean kitchen scissors, cut the whole thing, paper and all, into even strips.

Place onto fresh parchment paper and cut into strips about 1 to 1-1/2" thick.
The next step is actually rolling the treats into fun roll-ups!  I made mine thick and probably could have used a second cookie sheet (our oven is very small, so our cookie sheets are small, so this may not be the case for you with the deluxe ovens out there) to make a few more treats.

The completed roll-ups look like this:

Neat-ishly rolled for consumption!

After my success with the butternut squash soup sharing with little Lisa, we shared a mango fruit roll-up and she loved it!

"It's de-wish-us!"
So I batted a thousand with the orange food that day....felt pretty awesome!


Below is the super simple recipe - remember you have to dedicate a few hours of dehydrating time, so make sure you do not attempt to start this at 7 in the evening on a weeknight!  I plan on attempting this over the weekend using strawberries!


No Sugar Added Mango Fruit Rolls/Fruit Leather

Ingredients:
-Three large mangoes 

Directions:
1.  Pre-heat oven to 175 degrees or to 200 and reduce to just below 200 if your oven knob only goes to 200 like mine!
2.  Peel and slice mangoes getting as much of the fruit as possible.  
3.  Place fruit in blender and purée until smooth.
4.  Prepare a rimmed baking sheet (or two) with parchment paper or a SilPat.  
5.  Spread the purée on the baking sheet(s) to about 1/8" thick using a spoon, offset spatula, or any other tool you have to make it pretty smooth.  
6.  Place the baking sheet(s) in the oven for three to four hours, checking on it periodically to ensure the fruit is dehydrating and not cooking. 
7.  When the fruit is tacky to the touch, remove it from the oven and use a spatula to take it off the fruit leather.  Place it on a new piece of parchment paper.
8.  Use scissors to cut the paper and fruit together into strips, then gently roll them!
9.  Enjoy!


Monday, March 23, 2015

Sometimes I Make Toddler Approved Food!/I WANT SOUP!

I literally have the best "job" in the world.  I get to hang out with my niece (she turns two in less than two weeks!) all day long.  We go to the park, the craft store, the Children's Museum of Manhattan, the train, Starbucks (known to the little one as "BUDDAFALAIE COOKIE!"/that's "butterfly cookie" for those of you not fluent in toddler-ese), story time (Bank Street Bookstore has daily story time and then even have once a week with a fantastic singing story time - check out some of their songs here!), and we cannot wait for it to be a little warmer for more outside time!  The little one also enjoys making up her own songs, singing the ABC Song, identifying colors, shapes, and letters, having epic dance parties, and generally having an awesome time!

My little buddy, Lisa, really loves natural foods.  We share an orange every day (alright, so she kind of hogs it - "MORE PEEZ"- but you get the idea) and she loves carrots, broccoli, cantaloupe, apples, and....you get the idea.  She also loves soup.  I think she might be a soup-a-tarian.  She is incredibly sweet and calm 99% of the time, but one of the demands she sometimes has is her, "I WANT SOUP!" chant.  It is too cute and at least she is asking for something nutritious, so this is an easy toddler demand to fill.  I made an Italian Spinach Orzo Soup for her once and she really enjoyed it (I plan on making that a blog post soon!), so when I decided to make one of our favorites, I brought it to share with the adorable kiddo the next day.

The recipe is probably the simplest soup recipe ever with only six ingredients plus salt!  It is a butternut squash recipe and I know it is toward the very end of the squash season, but we love it so much I had to make it one last time before we can no longer find squash at our beloved Trader Joe's!  We used pre-cut butternut squash because that is all that is left in the stores, but I do love making it in the fall and throughout the winter with whole squash and roasting the seeds covered in a bit of salt in the oven for a great snack.  You also need some onion, green apples (I love using Granny Smith because they add a tiny tart punch to the flavor), chicken broth, rosemary, and bread.  When I lived in Virginia I used to go for the twofer of a delicious rosemary bread for even more of a flavor punch, but I have not found a great substitute for my Kroger bread (I have not really looked hard because I am positive I could find some in the city).  One time I even made this with gluten free bread for my gluten intolerant friend and it still tasted delicious!

When you combine all these ingredients in the pot it kind of looks like a really weird combination....

Everything in the pot!
Not to worry, though, because you bring it to a boil, aggressively season it, and either use a spoon to smash the chunks of apple and squash against the side to incorporate it into the soup or you could use the blender.  We like our soup with a bit more body, so we just manually smash it.

Eventually, your soup will look like this:

Voila!  It cooks down to look like this!
We normally make a sandwich on the side of our soup (or delicious crostini), so we utilize our old friend Jorgé/George Foreman.  Our panini sandwiches are made using any delicious bread (I used a multigrain Anadama bread from Trader Joe's - the origin story at the bottom of the Wiki entry is pretty funny!), some deli meat, and deli-sliced cheese.  If you drizzle a little olive oil on both sides of the bread before placing the sandwich into Jorgé or a fancy-schmancy panini press if you have space for single-function kitchen tools, cook until the cheese is melted, cut in half, then you can have a tasty looking meal like ours!  You could totally make your panini sandwiches with veggies or whatever else you like, we just tend to have a little protein on the side of our hearty vegetable soups!

The finished product complete with grilled panini!
Back to the toddler approval part.  I brought it the next day to share with Lisa unsure whether or not she would be into this particular soup (she does love the color orange, so it had that going for it!).  I got the best approval ever - she started stealing from my bowl when she finished hers!

"I like it!"
Here is the recipe (happy hunting for butternut squash!):


Butternut Squash Soup
(Serves somewhere in the ballpark of a small army/10 - 12)

Ingredients:
- 2 - 20 oz packages of pre-cut butternut squash or 3 pounds of butternut squashes, peeled and seeded
- 2 onions, chopped (I chopped my own onions this time!)
- 4 or 5 slices of bread (I have used rosemary bread, white bread, whole wheat bread, even multigrain or gluten free bread - it all works)
- 4 green apples (I prefer Granny Smith), peeled and roughly chopped
- 2 - 32 oz boxes of chicken broth (I use low sodium because I like to control the salt myself)
- 2-3 tbsp Rosemary (we used dried, but fresh would be great, too), crumbled in your hand or chopped
- salt

Directions:
1.  Chop the onion and start cooking it down in a large pot over medium-low heat while you prepare other ingredients.
2.  Drop the squash, apples, and broth into the pot and raise the heat to high.
3.  Tear the bread into small pieces and drop that into the pot.  
4.  Season the mixture with salt and some of the rosemary (I like to add it several times over the course of the cooking time).  Bring to a boil and turn the temperature down slightly.  
5.  Allow the soup to continue at a low boil and stir every few minutes.  Continue adding seasoning every few times you stir. 
6.  As the ingredients soften, begin smashing them against the side of the pot with a sturdy spoon or against the bottom with potato masher.  Do this gently as the soup is very hot and can hurt if you get splashed!
7.  If you prefer velvety soup, ladle some into the blender, blend it, return it to the pot, and repeat until you blend it all.  
8.  Serve on the side of sandwiches or salad.
9.  Enjoy!  

Sunday, March 22, 2015

Sometimes (Alright, Most of the Time) We Lighten Up a Recipe

Ever get completely ready for something, then check your email once you walk out the door and realize that your event was cancelled?  Well that happened to me Sunday afternoon with my soccer game, so we made a grocery list instead!  I mean, I was already wearing my shinguards and socks and only needed to put on my cleats and pre-wrap headband (a must for the wispy hairs!).  We brainstormed a few great meals for the week and headed into battle - I mean the Upper West Side Trader Joe's on a Sunday afternoon in the city.

Trader Joe's (TJ's) at peak times is hectic.  There are times when there is a line waiting to get into the grocery store as if it were a night club.  In spite of this, we love it.  You do perfect the art of shopping there over time and it really is best if you go in pairs.  We embarked on our adventure mid-afternoon, me still wearing all my soccer gear except for the shinguards, Jeffy not wearing a jacket with 20+ mile per hour winds - the usual.  We had a mostly successful trip except the Jewish flatbread we normally use for pizzas was sold out, so we had to improvise with naan.  We survived.  No worries.

The first recipe of the week I wanted to share was our Cauliflower Alfredo Pasta with Broccoli and Chicken.  Instead of a super heavy recipe using a whole stick of butter, a cup of heavy cream, and two whole cups of grated Parmesan like this delicious looking one by The Pioneer Woman, Ree Drummond, we used cauliflower, skim milk, and less than half that amount of Parmesan.  I love cooking with cauliflower because it takes on flavors so well and who would not want to enjoy a vegetable "prized by the court of King Louis XIV"?  Maybe France would have been in better shape if the court shared some of the health benefits of cauliflower with the Third Estate instead of building the amazing, but entirely too extravagant Palace of Versailles, perhaps that little French Revolution thing (you could learn more about here....on my class website from last year!) would not have been quite so bloody.  It would have probably still happened, but sharing healthy veggies would have been a kind gesture.

Alright, back to the actual cooking.  This recipe seems very involved, but it really is not at all.  You start by either cooking the cauliflower in some salted water (salt adds flavor!) or steaming it until you can pierce it with a fork easily.  While that is cooking, you season some grilled chicken and toss it on the grill/Jorgé (our trusty George Foreman), then cut it into bite sized pieces like this:


Jeffy did a nice job grillin' and choppin' the chicken!

Once the chicken is underway, you boil a pot of some more very salted water to cook the pasta in and steam or cook the chopped broccoli in lightly salted water.  When the cauliflower is cooked, you blend it/food process it with a little salt, pepper, two tablespoons (six less than the heavier recipe!) of butter, milk (skim works!), and 3/4 cup shredded Parmesan (instead of two full cups).  Briefly cook this purée with a chopped shallot and combine the sauce with the pasta!

Our combined pasta and sauce mix looked like this:

Combined pasta and sauce, pardon the messy stove!

Top it with chicken, broccoli, and a few more pieces of Parmesan and you have a deliciously filling meal that is less than half the calories of the original recipe!  Our final product looked like this:


We used the sauce and chicken for two nights worth of food and cooked brown rice spaghetti as our pasta of choice on night two with some asparagus (we had eaten the broccoli already on its own by the second cooking!).

Here is the recipe:

Cauliflower Alfredo Pasta with Chicken and Broccoli
(Serves 12 - 16 depending on how much pasta you eat!  We used this for two separate nights worth of meals!  You can easily halve the ingredients if you want just one night.)

Ingredients:
- 3 packages (12 ounces each) cauliflower, or about two medium heads of cauliflower, roughly chopped (going in blender anyway)
- 2 tbsp butter (we always use salted because we like it for our popcorn!)
- 3/4 cup milk (we used skim)
- 3/4 cup shredded or grated Parmesan (we used shredded - it's going into a blender!), plus more to top with
- shallot, chopped
- 3 large chicken breasts
- 2 tbsp olive oil
- 2-3 large stalks of broccoli, chopped
- 2 packages of pasta - we used Gemelli on night one and brown rice spaghetti on night two, but any pasta that holds sauce a little works
- salt
- pepper

Directions:
1.  Begin by either steaming the cauliflower or cooking it in salted boiling water until it can be pierced easily by a fork.  
2.  While the cauliflower is steaming, season both sides of the chicken breasts with olive oil, salt, and pepper and grill until cooked through.  Cut the chicken into bite sized pieces and set aside.  
3.  Cook the pasta in heavily salted water to package directions minus one minute of cook time.  Drain and keep about one cup of pasta water for later.  Return the pasta back to the pot.  
4.  Cook the chopped broccoli in lightly salted water or steam it until it can be easily pierced by a fork.  Set aside.  
5.  Into a blender or a food processor, scoop in the cauliflower with a slotted spoon.  Add salt, pepper, butter, milk, and shredded Parmesan.  Blend well.  Taste and add salt and pepper as needed.  
6.  While you are blending the cauliflower, chop the shallot and cook it in a non-stick skillet with a little olive oil, salt, and pepper about two minutes.  
7.  Combine and cook the cauliflower purée with the cooked shallot over medium heat for one to two minutes.  Then add this mixture to the pasta and stir well.  If the sauce is too thick, this is when you will want to add that good starchy pasta water in small amounts to help the sauce stick to the pasta and to make it even more tasty.  
8.  Finally, plate by scooping pasta into a bowl or onto a dish, then top with a handful of chopped chicken and broccoli and a few pieces of shredded Parmesan on top.
9.  Enjoy!  

Saturday, March 21, 2015

Sometimes We Make Pancakes on Sunday!

Long ago in a fairytale world called Lexington, Virginia, I used to walk to 11 AM church service at the Lexington Presbyterian Church and make banana pancakes for brunch before heading to Charlottesville for soccer and ice hockey.  Things are a little different now in the big city and I do not make it to church as often as I would like to (my fault entirely), but I still love to make pancakes on Sunday!  This week's version is healthy (very low in added sugar!) and delicious!

We tend to cook with what we have on hand most Sunday mornings (except when we make delicious Poached Eggs on Avocado Toast), so we used whole wheat flour, rolled oats, pumpkin puree, unsweetened apple sauce instead of oil, and chocolate chips to make....WHOLE WHEAT PUMPKIN CHOCOLATE CHIP OAT PANCAKES!  (Yeah, it's a mouthful to say, but a delicious mouthful to eat!)

You may ask why we are still cooking with pumpkin in March and may sound like a good question to you, but I return with why should we limit our love of pumpkin to the fall?  Yes, we cook a ton of pumpkin and squash recipes all fall and winter long like everyone else.  We also used to love the pumpkin spice latte (I got one with way too much syrup and I could feel diabetes creeping into my veins, so I tossed it).  We made this delicious pumpkin spice cake inside of an actual pumpkin:


The recipe was by Katie Lee on The Kitchen (another one of our faves) and is here:

Mini Pumpkin Cakes

We topped it with maple syrup and it was soooooooo delicious!


Alright, back to my actual recipe.  Since we love cooking and we cook a lot of pumpkin-related items, we should have a bottle of pumpkin pie spice, right?  NO!  It is much more fun to make your own spice mix and then you can use the other spices in future recipes!  Through the magic of Google and simple math (not so simple using Common Core math, but that would be an entirely new blog with a lot of anger from most people!), I found a more accurate ratio for my spices than my normal "dash of this, dash of that, did I add all the spices I needed to?"

Enough gibber-jabber, here is are some glorious pictures of my creation (Jeffy helped with the mixing and the eating for this recipe!):

The mixture looked like this - it is thicker than your average pancake!

Four cooking at once! 

Jeffy performing a taste test.  Approved!


My food photography skills are still not improving....


Here is the recipe:

Whole Wheat Pumpkin Chocolate Chip Oat Pancakes
(Yields 12 pancakes)

Ingredients:
- 1 cup whole wheat flour
- 1/2 cup rolled oats
- 1 1/2 tsp baking powder
- 1 3/4 to 2 tsp pumpkin pie spice*
- 1/4 tsp salt
- 1/4 cup sugar 
- 1/2 cup chocolate chips
- 2 eggs
- 1 cup (about 2/3 can) pumpkin puree 
- 2 tbsp unsweetened apple sauce
- 1/2 to 3/4 cup milk (we used skim because that's what we had!)

        * Recipe for 1 3/4 tsp Pumpkin Pie Spice:
          - 1 tsp ground cinnamon
          - 1/4 tsp ground ginger 
          - 1/4 tsp nutmeg
          - 1/8 tsp ground all spice 
          - 1/8 tsp ground cloves 


Directions:
1.  In a large bowl, combine all dry ingredients (from flour through chocolate chips).  Whisk together to ensure distribution of spices.  
2.  Add the wet ingredients to the dry ones.  I added 1/2 cup of milk originally, but added a little more because it was just a little too thick.  If you want to add more apple sauce for a little more fiber, you only need 1/2 cup of milk.  Making pancakes is about creating a batter where it's slightly runny but these are not like regular pancakes because the addition of oatmeal and delicious pumpkin makes them a little thicker.  Moral:  Add 1/2 cup of milk, then add more to thin it if desired.
3.  Mix to combine ingredients, but do not over mix (the batter gets too tough).  
4.  Heat a non-stick skillet over medium heat (or a griddle).  When you splash a few drops of water onto the pan and they bubble, that's when you know it is ready. 
5.  Scoop equal portions (approximately 3 tablespoons) of mix using a spoon or ice cream scoop onto your heated surface.  When pancake surface begins to show bubbles, flip them and cook for a minute or so more.  Put your cooked pancakes on a plate and repeat with the rest of your mixture.
6.  Enjoy!